Customizing a message with information about your recipients is a good email practice. As a general rule, your recipients will appreciate receiving a personalized email. They will feel more valued, and this will also make the content more relevant. Your communication will therefore capture your contacts’ attention more quickly.
Personalization will only be possible if you have information about your recipients in your contact list: first name, last name, title, or any other information.
A link will therefore be created when setting up your campaign between your contact list and your message. For this specific use, it will therefore not be possible to add this option in a template. Also, be sure to carefully choose your contact list before adding personalization to your message; otherwise, the link will not be established correctly.
Let us look at how to add the option in your message:
Once your contact list has been selected in your campaign, proceed to the “Message” step:

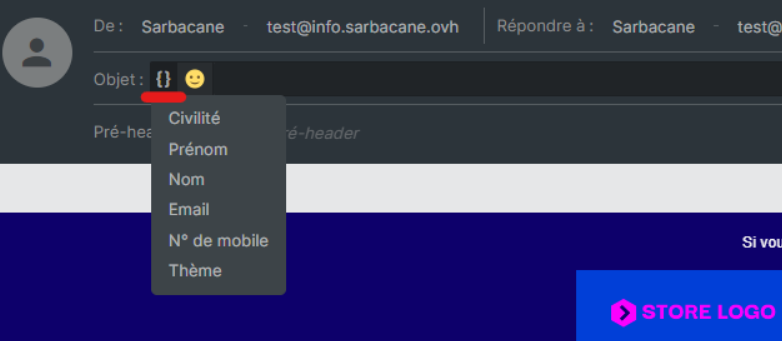
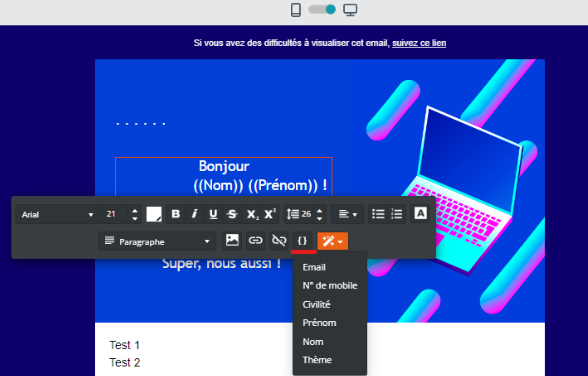
You can insert the personalization option in two different places in your message.
In your subject line:
In your message body:
It is important to correctly add your test address among the recipients when you use this feature, by filling in the required fields when previewing your message.
