The Email Builder is an email editor designed by Sarbacane with the aim of simplifying your work in creating email campaigns and newsletters.
The ease of use of the Email Builder lies in the fact that you do not need any technical skills in HTML or CSS to create an attractive, responsive, and effective email campaign.
A simple drag & drop game (or drag-and-drop) allows you to add your content, texts, and images, and to format them effortlessly. Everything (or almost everything!) is configurable and customizable: graphic style, colors, spacing, borders, typography.
Accessing the Email Builder
When you create an email campaign from Sarbacane Campaigns, whether you choose to start from an existing model, a Sarbacane template, a Smart Template, or a blank page, you are redirected to the Editing step. It is at this stage that you will be able to use the Email Builder and thus customize your email campaign.
Note: if you choose HTML file import as the creation mode, you will then be redirected to Sarbacane’s WYSIWYG HTML editor, and not to the Email Builder.
The editing screen
The editing screen is composed of three areas:
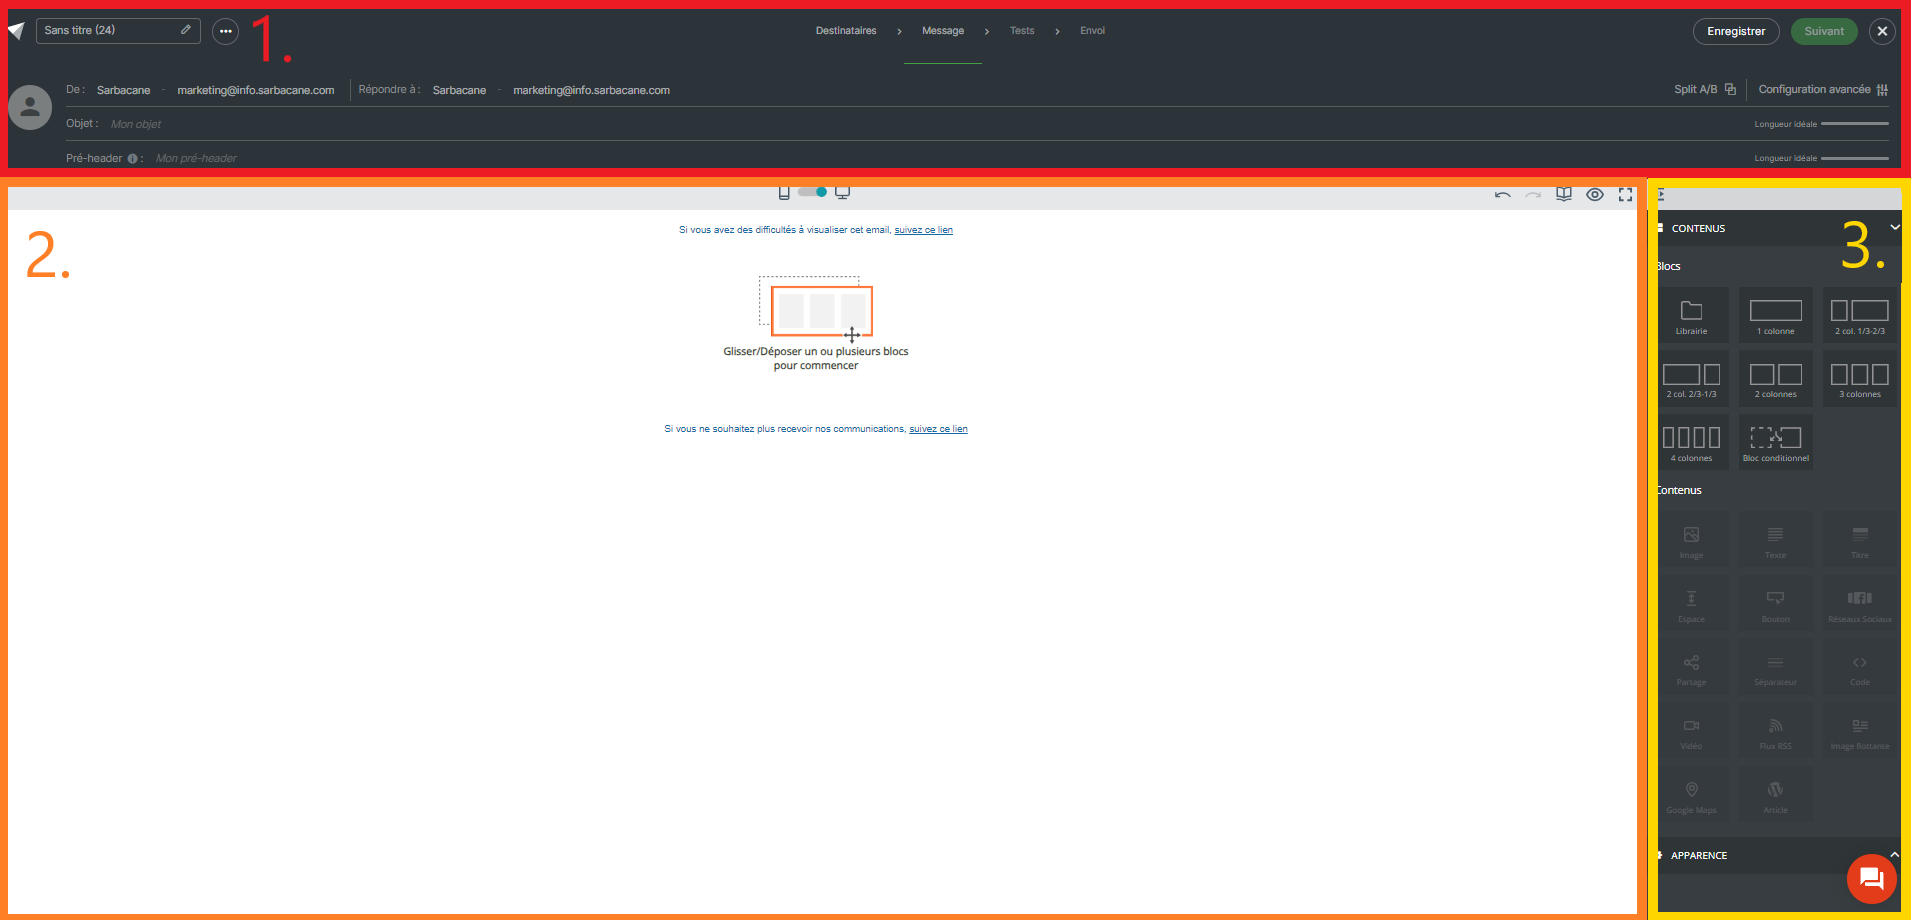
1. The upper section, which allows you to manage the header of your email: subject line, preheader, sender, attachments, etc.
2. The workspace, which allows you to build your email campaign and view its rendering in both desktop and mobile versions.
3. The right-hand panel, which allows you to select layouts or blocks or content to drag and drop onto the workspace.
The workspace
You can increase the size of your workspace to enhance your comfort of use.
Increase the width of your workspace by collapsing the right panel.
Click this button, located at the top of the right panel, to collapse the panel. This action is reversible by clicking the same button.
Increase the height of your workspace by switching to full-screen mode.
Click this button, located at the top right of your workspace, to hide the left column and the header bar.
By default, the display mode of your workspace is the desktop version, meaning that you view your email as if it were being read on a computer.
You can view how your email will appear on a smartphone by clicking the switch button located above your workspace.
Composition of the “content” panel:
This panel allows you to select your blocks and content. To create your email, you must first select the block that will host your content. To do this, you can choose from numerous blocks, including:
Blocks previously saved by you in the Library.
Column blocks, offering from 1 column to 4 columns.
The conditional block, through which you can define several versions of content. Each of these versions will be displayed according to rules that you define using the data from your recipient list. To learn more about conditional blocks, you may refer to the dedicated article.
Once your block has been selected and placed on your workspace, you can insert content, including:
Image, Text, Title, Space, Button (CTA), Social networks, Sharing, Separator, Code, Video, RSS feed, Floating image, Google Maps, Wordpress article.
