Sarbacane's Email Builder is the ideal tool for quickly and easily creating attractive emails. This email editor operates on a drag-and-drop principle, which means you can design your message by simply placing visual elements where you want them in your email.
Here is a comprehensive video on using Sarbacane for your first email campaign
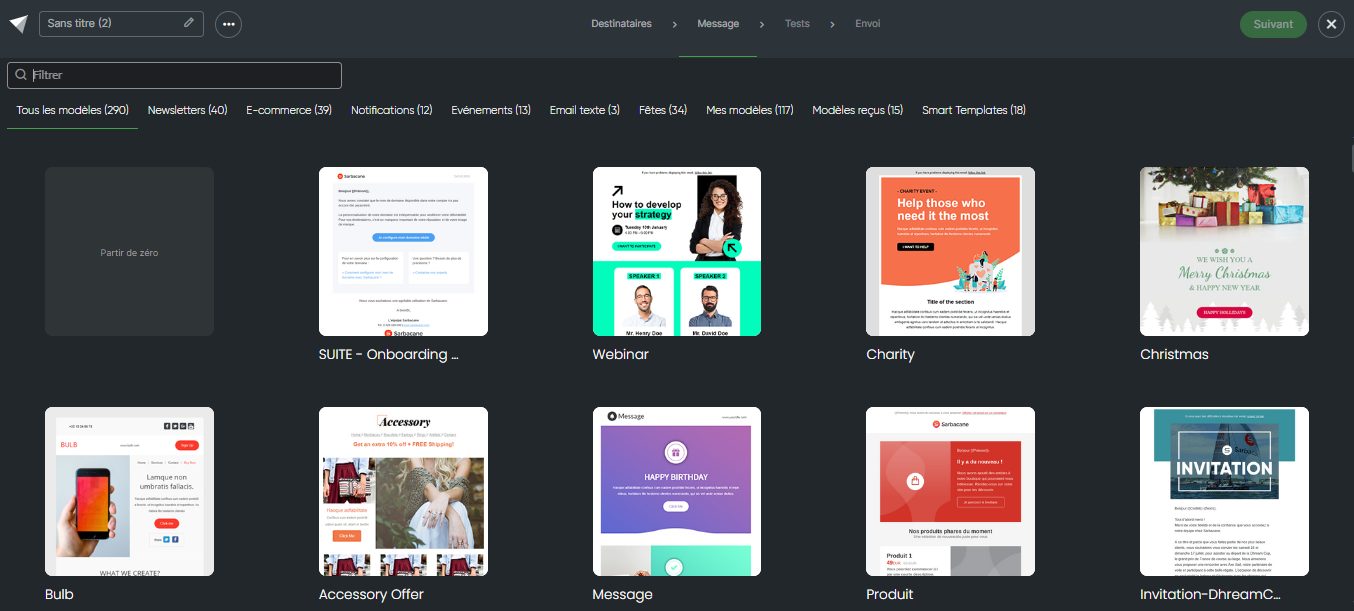
When you choose the Email Builder as your creation mode, you have several options available to create your email campaign:
Start from scratch: If you have a clear vision of your email and prefer to create everything yourself, choose this option. You will start with a blank message that you can customize as you wish.
Start from a Sarbacane template: If you are looking for inspiration or want to save time, select one of Sarbacane's free pre-designed email templates. You can then customize this template with your own text, images, and colors.
Start from one of your templates: If you have created custom email templates previously, you will find them in the My Templates tab. You can easily reuse and customize them.
Start from a received template: In the "Received Templates" tab, you will find templates that have been shared with you from another Sarbacane account. You are free to use them to create your email campaign.
Start from a Smart Template: This feature analyzes your website based on its URL and generates email templates in a few seconds that are faithful to your visual identity and ready to be sent.
For each option, the use of the builder remains substantially the same, you can find in this article the uses of each block.
After selecting one of these design options, we will detail the options available to you for your configurations.
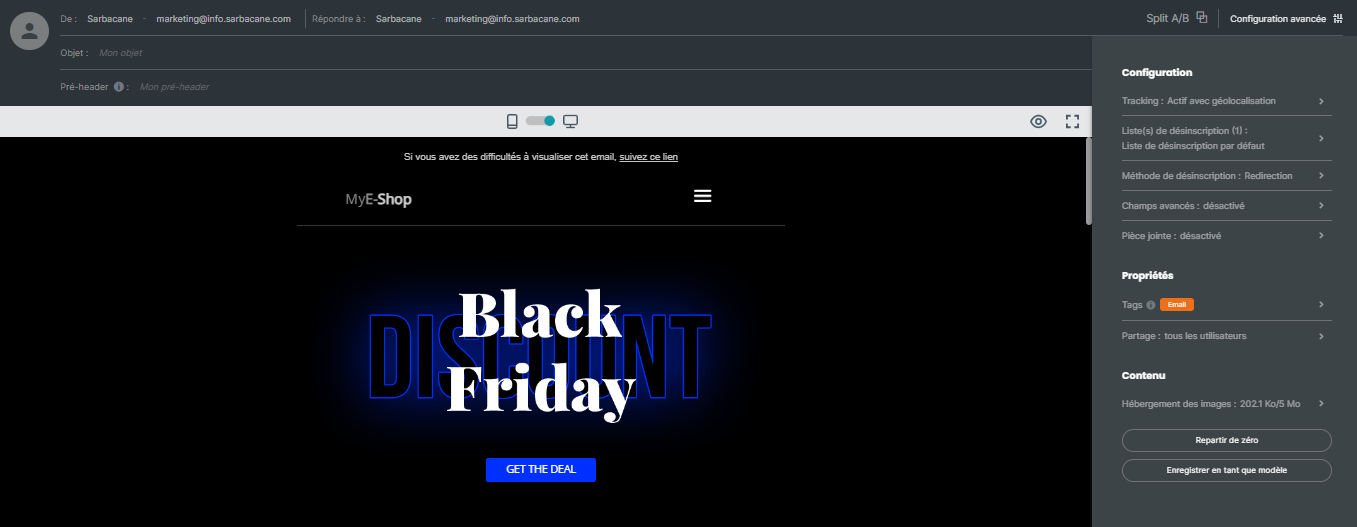
For each email campaign created with the Email Builder, you have access to the following advanced configuration options by clicking on the "Advanced Configuration" section in the top right of the editor:
Configuration:
Tracking: Enable/Disable tracking options
Unsubscribe list: Define one or more unsubscribe lists for your email campaign, giving your recipients the option to unsubscribe if necessary.
Unsubscribe method: Define here what should happen when a contact clicks on the unsubscribe link in your campaign: Be redirected to a standard Sarbacane page confirming the unsubscription. Be redirected to a custom unsubscribe form. Be redirected to a page on your site if you manage unsubscriptions via a page external to Sarbacane.
Advanced fields: Enable/Disable the display of advanced fields such as blind carbon copy in the available fields in your campaign header. Please note that blind carbon copy does not send the added contact a copy of the campaign. They will only receive responses made by the recipients. As a reminder, one credit equals one recipient.
Add an attachment to your campaign. Learn more
Properties:
Add tags to your campaign: this option allows you to organize your campaigns by channel or topic and filter statistics by tag.
Sharing: this option allows you to define which users and user groups can access your campaign.
Content:
Image hosting: choose where to store the images in your email: on Sarbacane servers, on an external server, or directly in the email body.
Start over: If you wish to restart your creation from scratch, use this option to reset your current work.
Save as template: At any time, you can choose to save the template you are creating/customizing in order to reuse it later. By clicking this button, you will have the option to define a name for your template and choose which users will have access to it in case you are sharing your account (learn more about account sharing).
