Are you a Hubspot user and would like to strengthen the automation of your prospecting by synchronizing your CRM with Datananas? Discover here several interesting ways to connect Hubspot and Datananas using Zapier. To assist you in setting up automations between the two solutions, we also recommend consulting this article which presents the elements that can be automated in Datananas via Zapier.
Here is a breakdown of the main use cases:
Finding contacts
Scheduling appointments
Detecting business signals in Hubspot
Generating traffic to your landing pages
Do you use our Connect extension to fuel your prospecting with new contacts? The following zap will allow you to automate the creation of these contacts in your CRM when they are added to Datananas.
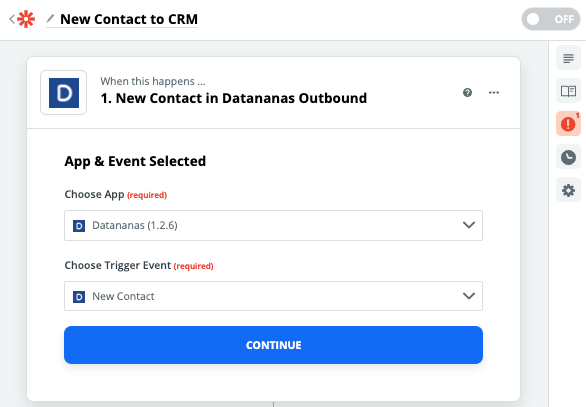
Select Datananas as the “trigger” application for your zap.
Among the “trigger events”, choose “New Contact”.
Test your zap by connecting your Datananas account and define the test contact whose data will be used to verify the proper functioning of your zap throughout the process.
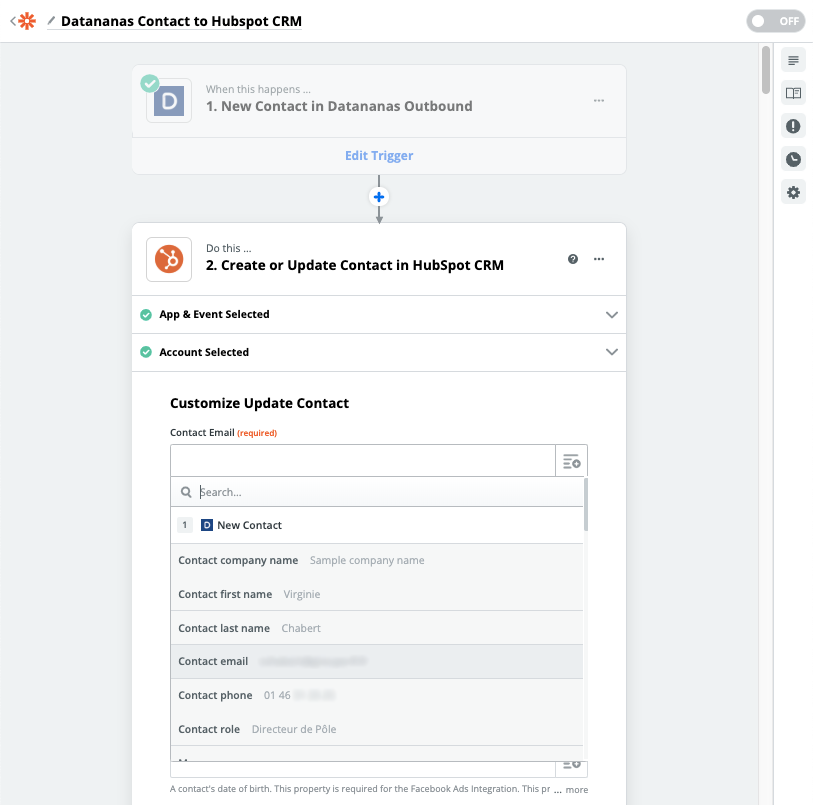
Select “Hubspot CRM” as the target application for your action
Use the “Action Event” “Create or Update Contact”
Connect and then select your Hubspot account
Use the drop-down menus to match the Hubspot and Datananas field values
Validate and test your zap using the data of the contact selected in step 1
Once this zap is activated, any contact added to Datananas will also be created in your CRM.
NB: If you wish to restrict this automation to contacts created only using Datananas Connect, it is in particular possible to add an additional filter step to your zap. Configure the filter so that the zap is validated only if the “Contact LinkedIn url” field is filled in on your Datananas contact. This field is automatically filled in when creating a contact using Datananas Connect.
Datananas makes it easy to qualify lists of cold prospects.
By using a meeting proposal as a call to action, you will be able to secure interviews without picking up your phone.
The AI embedded in Datananas analyses the content of each reply received to determine its nature. It is possible to use this reply status (positive, negative, etc.) as a Zapier trigger in order, for example, to create a new contact in your CRM for each positive reply received. Here is how to proceed:
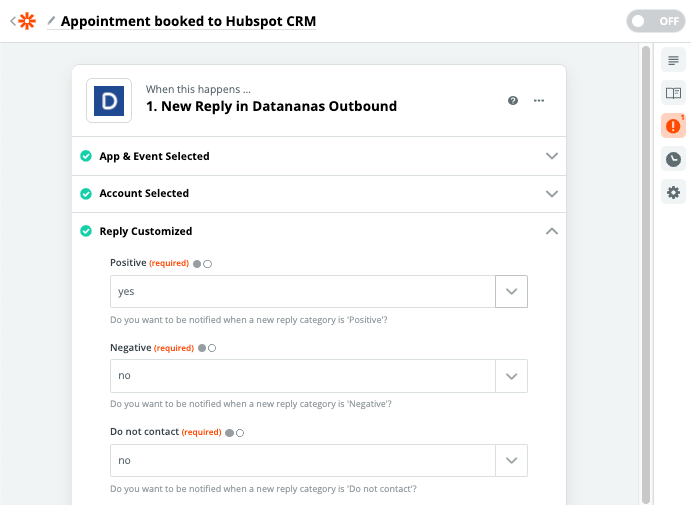
Select Datananas as the “trigger” application for your zap
Among the “trigger events”, choose “New Reply”
Connect your Datananas account
Choose from all the response types those that seem most relevant to you
Test your zap and define the test contact whose data will be used to verify the proper functioning of your zap throughout the process

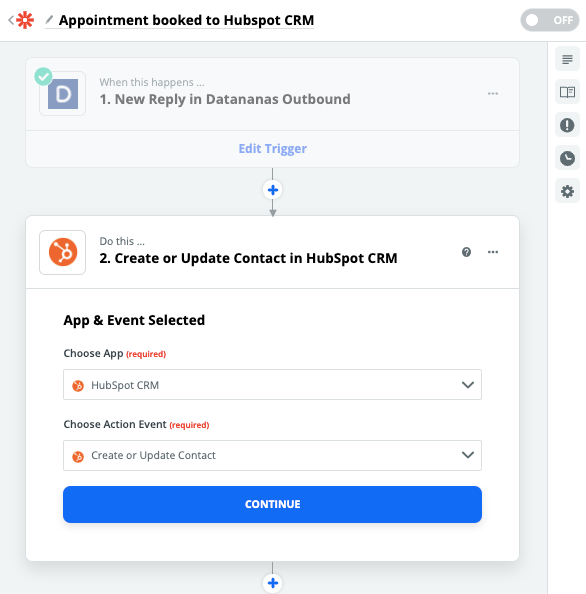
Select “Hubspot CRM” as the target application for your action
Use the “Action Event” “Create or Update Contact”
Connect your Hubspot CRM account
Use the drop-down menus to match the Hubspot CRM and Datananas field values
Validate and test your zap using the data of the contact selected in step 1
Once this zap is activated, the receipt of any new response with a category that is one of those selected in step 1 will trigger the creation of a contact in Hubspot CRM.
By using Datananas to optimize your appointment scheduling and by selecting only the “positive” responses when creating this zap, you can therefore automate the creation in Hubspot CRM of contacts that have accepted an appointment.
Many prospects, often originating from inbound, arrive in your CRM without being sufficiently qualified to justify a sales representative’s call. What should be done with these prospects? A good practice is to design sequences intended to collect the key information that will enable you to qualify, or not, your prospects using business signals such as, for example, their level of equipment or the duration of their commitment with a potential competitor.
When an opportunity is detected, you can qualify your prospect in Datananas and the following zap will allow you to automate the creation of the contact in your CRM.
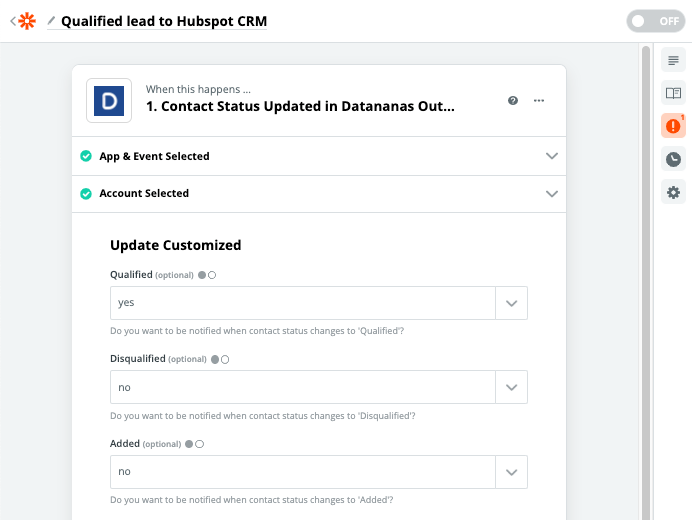
Select Datananas as the “trigger” application for your zap
Among the “trigger events”, choose “Contact Status Updated”
Connect your Datananas account
Choose from all the statuses those that seem most relevant to you (we recommend “Qualified” here)
Test your zap and define the test contact whose data will be used to verify that your zap works properly throughout the process
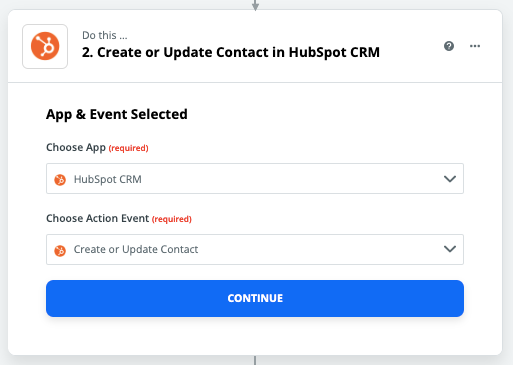
Select “Hubspot CRM” as the target application for your action
Use the “Action Event” “Create or Update Contact”
Connect your Hubspot account
Use the drop-down menus to match the Hubspot and Datananas field values
Validate and test your zap using the data of the contact selected in step 1
Once this zap is activated, each click on the “qualify” button on a contact record in Datananas will trigger the creation of the prospect in Hubspot CRM.
Emails sent via Datananas have a better engagement rate and deliverability than marketing emails that include templates and are sent using emailing servers for which IP addresses are often shared. Using Datananas to share a link to one of your landing pages containing a form is therefore a good way to boost your conversion rate.
If your form was created using a tool compatible with Zapier, once the form has been completed, you will be able to qualify the prospect in Datananas, unsubscribe them from ongoing sequences, and create them in Hubspot CRM using a zap similar to this one. Here, we will use as a trigger the submission of a registration form available in Hubspot.
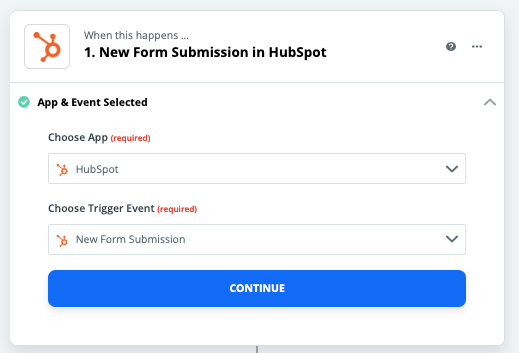
Select Hubspot as the “trigger” application for your zap
Choose the “New form submission” trigger
Connect Hubspot to Zapier
Select the relevant form (you will be able to duplicate or edit the Zap for each of your forms)
Test the step by choosing a Hubspot contact whose data will serve as a sample. To ensure that all tests run correctly, the participant selected here must exist in your Datananas account. If necessary, create a fictitious contact
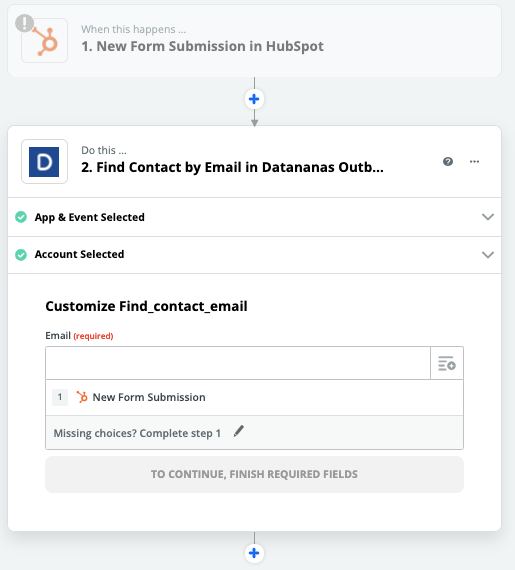
Add a step to your Zap and select Datananas
Choose the action “Find Contact by Email”. This will allow you to retrieve all information about your prospects stored in Datananas based on the email address of the new subscriber
Connect Zapier to your Datananas account
Use the drop-down menu by clicking on the icon to the right of the field (you will see all contact data sent by Hubspot appear) and select the lead’s email
Proceed with testing the step. The test will be validated if the sample contact selected in step 1 exists with the same email address in your Datananas account
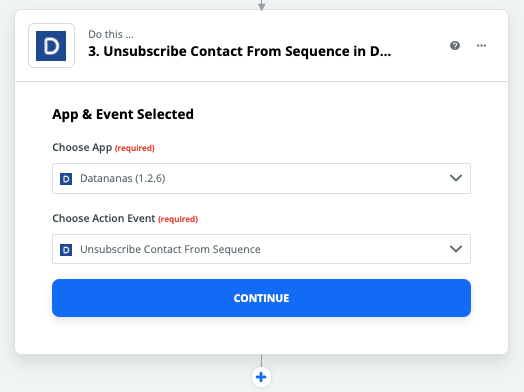
Add a step to your Zap and select Datananas.
Choose the action “Unsubscribe Contact from Sequence”
Select your Datananas account again
In the “Sequence ID” field, use the dropdown menu to select your invitation sequence from your Datananas sequences.
In the “Contact ID” field, using the dropdown menu, select “Use a custom value” (at the bottom of the list). A new field appears. It allows you to select a value from those available in the previous steps. Select step 2, “Find Contact by Email” with Datananas. Finally, choose the value “ID”
Step 4: Datananas Action
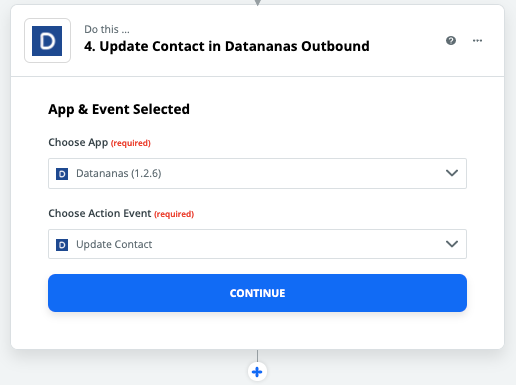
Add a step to your Zap and select Datananas.
Choose the “Update Contact” action
Select your Datananas account again
Use the dropdown menu of the “id” field to select the “ID” value from step 2 (“Find Contact by email” in Datananas)
Select the “Qualified” value for the “Status” field using the dropdown menu
Once this Zap is activated, Datananas contacts who complete your form will be available in Hubspot, removed from sequence and marked as Qualified in Datananas.
NB: If your form editor is not compatible with Zapier but is connected to Hubspot, you can use the “New Contact Property Change in Hubspot” trigger. When designing your form, create a dedicated Hubspot field and use the change in the value of this field as the trigger for your Zap.
Some form-building tools are directly compatible with Zapier. This allows you to trigger the Zap only after the relevant form has been completed, rather than at each lead creation. To find out how to set up this type of Zap, read our guide dedicated to Livestorm, a platform designed to organize webinars: https://intercom.help/datananas/fr/articles/3414208-livestorm-x-zapier
