In Sarbacane, an administrator can create user groups to control the sharing of resources (campaigns, lists, templates, forms). Group creation and management are done in the account settings, via User Management then the Groups tab.
Note: on your first login, a default group contains all of your users.
To create or manage a group, you must have the Administrator or Owner role [to verify: the source only mentions administrators].
In Sarbacane, click on your avatar, in the top right corner of the screen.
In the Account section on the left menu, select User Management.
Open the Groups tab.
Click on Create a group.
administrators
You will then be able to add the desired users to your newly created group.
Only users with the User role can be distributed into groups, and a user can belong to only one group. By default, they share their resources with all users in their group, as well as with the Administrator(s) and the account owner.
Important: administrators and the account owner cannot be assigned to a group. They have access to all account resources (campaigns, lists, forms).
Each group has a context menu providing access to its settings via the Manage button:
Tab Users: add a new user, transfer members from one group to another, manage each user's permissions.
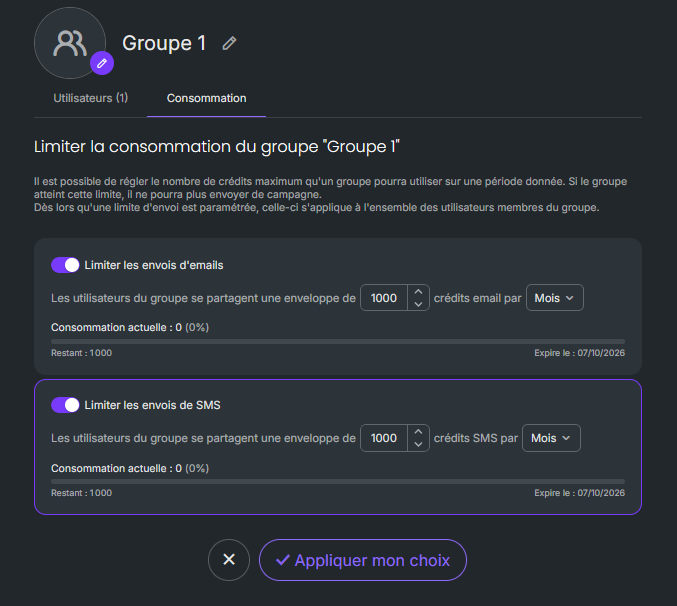
Tab Consumption: set a sending limit for emails and/or SMS for the group.
Edit button located to the right of the group name: rename the group
Important: before deleting a group, its members must be transferred to another group. A group cannot be deleted if it is the last existing group.
Deleting a group transfers the data and members that belonged to it to another group. The accounts of the users concerned are not deleted.
Users transferred to a new group access the resources shared with that group (campaigns, email templates, contact lists, forms, pages, blacklists). They retain the rights that the administrator had previously granted them (sharing, campaign sending, contact export).
To delete a group, use the delete button from its context menu [to verify: exact button label].
Two conditions block deletion:
The group still contains members. Transfer them to another group from the Users tab, then retry the deletion.
The group is the last existing group in the account. In this case, deletion is not possible.
